This post is to guide you to use the XP theme, and also to give you the possible solution on the problem like the XP skin change to classic skin, or the folder background won't show. Below guide and solution is what I know, therefore there might be other better solution sleep in the world wide web, if you know any, please let me know ;).
Shortcut
Guide
- Using Anime XP Theme
- Without Installer
- With Installer
- Anime LogonUI
- Anime Mouse Right-Click Menu
- Seiyuu System Sound
- Windows Classic Skin
- Folder's Background Image
Start Here
Guide
Using Anime XP Theme
If you download the anime xp theme from sola1412, there is only 2 type, one is with installer and another is without. Both also very easy to use, me will try to share with the non-installer version, but sometime due to the rule, the installer must use. Please continue read below for the guide.
Without Installer

- Usually it contain this 3 file after you extract from the compress file you had download.
- The important file the filename with school day (for example), the read me is just a file that tell where the source came from.
- What you have to do is copy and paste both "school days" file & folder into the theme folder of you Windows.
C:\WINDOWS\Resources\Themes

- After that, execute the "school days.Theme" file (with a paint brush logo).

- The Display Properties will appear, just select "Apply or Ok", then your XP will change to the theme.

- Execute the installer and this language option will prompt.
- Select the English from the list, I'm not sure other language is working or not -.-', then Next.
- Just select Next if you come across anything until you reach this USER AGREEMENT section, it is important because password is inside there.

- In this case, the password will be "bbs.acgdiy.com", alot people misunderstand and visit that site for password, actually that URL is the password. Copy the password and continue NEXT.
- When the installer ask you for password/code or similar thing, paste the password you just copy. Then NEXT and follow instruction.

- When it finish install it will prompt you the above section, select the Launch "... XP Theme", and select the FINISH button.
- The Display Properties will prompted, and just select OK or Apply button, the theme will change.
- If you know you haven't installer any UXTheme Patch, then tick the Patcher option before select the Finish Button. Patcher guide read at below.
- If the your XP Theme become Windows Classic Skin or nothing happen, then please refer to below solution.
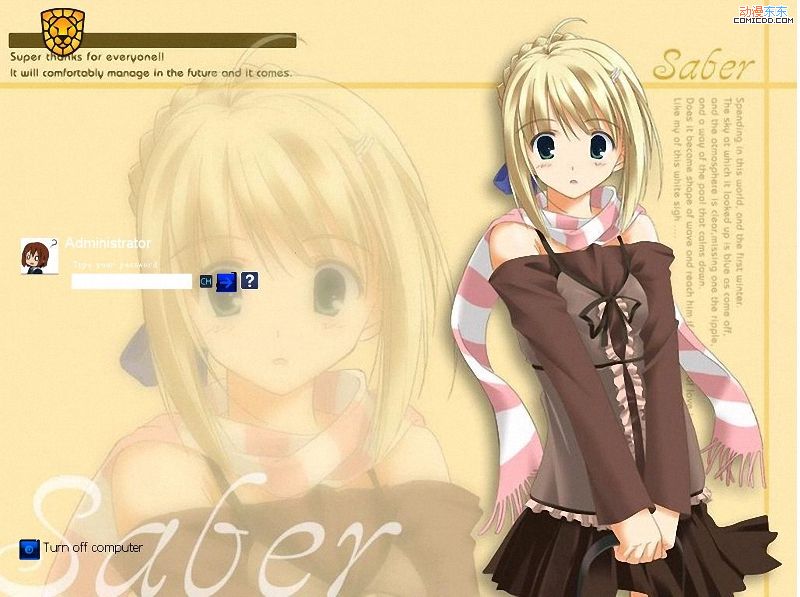
Anime XP theme is not limited to only Windows Theme, this logon user interface is sometime come together with the Theme pack. If it is come with a folder, you need to manually use it, else if it is come together with a installer, then it is automatically apply.
First thing you need to do is download the LogonUI replacement tool, there is no any specify tools, there is plenty of similar tools float in the web. If you lazy to search, just download the one I'm using, get it via link1, or link2. After download, extract and install it.
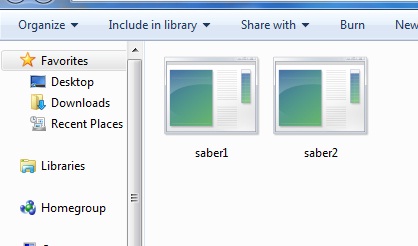
Usually before I repost, I will put the LogonUI file into a folder for easy organize and use. The LogonUI file is actually in the ".exe" file extension, in above picture is like "saber1.exe", it is not an application, if you double click it, it won't have any effect.

To use it, open the LogonUI replacement tool that you just download and install. Then choose the "Select a LogonUI file..." button, and select the logonUI file.

After the selection, program will prompt you a message like above picture, please be sure that you did not select a wrong ".exe" file. After that, it is done, and you can close the program.
Note: Previously, when I using other similar program to replace the LogonUI file, and I accidently select a installer ".exe" file (wrong file >_<'), during my login session, it become a installation process, and I can't log into Windows anymore :(. Best solution is separate the LognUI file and other ".exe" file in different folder. And no matter using what program, please select carefully :).
Mouse Right-Click Menu

Some of the theme has also include the mouse right click menu background, which enable a image display on the background of the right click menu, just like the above image.
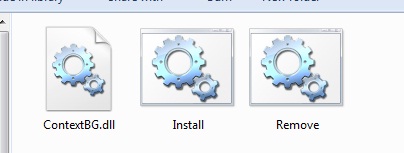
Usually this come with 3 file in the folder, for example above screenshot, "ContextBG.dll", "Install", and "Remove", this 3 file name usually same.
In order to use it, just double click on the file with the name of "Install", it will automatically enable and use this beautiful right click menu bg. Sometime required restart to take effect.
In order to remove it, just double click on the file with the name of "Remove", it will remove this image from the right click menu bg. Sometime required restart to take effect too.
If there is multiple different bg, and you wish to try it all, please remove the current mouse right click menu only proceed to use the new or another right click menu bg, or else sometime there will be some problem.
Seiyuu System Sound
Usually in Anime XP Theme, the author alway using the particular anime OP and ED music as the Windows startup or Windows Exit sound, but sometime they using some system sound that voice by seiyuu, like the sound like "Empty Recycle Bin", "Windows Maximize" and etc. This voice can be easily found in the Web too.
System voice or sound can be easily replace or change. First thing you need to be sure is the voice or sound file you need to change is in WAV format (Windows only accept wave format). Then you go to your right hand side of your taskbar, right-click the Sound Icon (
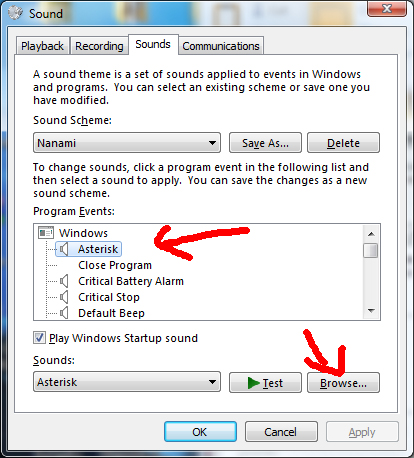
After this Windows pop up, you has choose the 2nd tabs or the Sound tabs (don't follow this screenshot), then you will see something similar like above picture. Just select those sound like "Exclamation", "Windows Startup" and etc. then select "Browse" button to select the file you want to change. After that just click on the "Apply" or "Ok" button and you good to go ^^.
Problem
This section will look into the problem after the apply the theme. For example, theme become Classic Skin when apply the theme, and etc.
Windows Classic Skin

Windows Skin has turn into Windows Classic Skin after use the download anime XP theme, this is most likely your Windows "uxtheme.dll" not yet use any patch (or crack). Originally, Windows has restrict us to use any unsigned(or third party) theme, therefore this file has to be patch with certain software, for example like UXTheme MultiPatcher, and etc. Refer to solution UXTheme MultiPatcher 6.0.
Folder's Background Image

Not all folder background will be displaying the image, only those originally has image will display. For example like "My Pictures", "My Music", "My Video", and etc. If there is no background image when you use the anime theme from those folder I mention, then there is something wrong. Don't panic, it just a option you did not enable. The solution will be discuss further at Solution section below.
Solution
UXTheme Multi Patcher 6.0
The UXTheme Multi Patcher 6.0 can be download via here. Before you proceed, please be sure your Windows not yet use any other patcher, expecially from UXTheme Multi-Patcher (not sure on other patcher). If you does, uninstall/unpatch it with the version before using this 6.0 version, or else there might have some problem, depend on your luck.
This patch is search from the internet, so I am not guarantee that this patch will not bring any harmful to your Windows or computer. I will not take any responsibility if Windows crash or etc. Use it on your own risk :). The worst I encounter is I unable to use anymore theme because I patch and unpatch several time -__-', just stay in classic skin that all.
Patch

- After you download the patch, extract and then execute it.

- After that, this window will be prompted, and select "Patch" button to continue.

- Then, the OS Detection windows show up, just select "Ok" button to continue.

- After that, this windows will prompted to you to see, then "Ok" again to continue.

- At this point, your Windows skin will become windows classic theme, so it mean the patch is work. Follow the instruction, select ok to restart the Windows.
- After restart, your Windows now should be able to use any other 3rd part theme.
Unpatch
To unpatch the UXTheme Multi Patcher, all you just has to do is to execute the same patch again. Please remember use back the same version else problem will occur. When you unpatch, Windows skin will become classic again, after that just restart and it will return to normal.
Not recommend to unpatch, if you patch and unpatch several time, the uxtheme.dll will spoiled, I encounter before that it unable to use any more theme, stay classic forever.
Enable Folder's Background Image

- Right click on "My Computer", then select "Properties".
- After "System Properties" show up, select "Advanced" tabs.
- After that, select the "Setting" under the "Performance".

- After that, Windows will prompt you the "Performance Options".
- Under the "Custom:", look for the "Use a background image for each folder type".

- Enable that option just like above picture.
- Then select Apply or Ok, and the folder now will display the background image.
End Here
Thank you for reading, hopefully you understand, free to to leave comment or questions. Sorry for my bad english.
No comments:
Post a Comment